
Combining the advanced features of SoftEther VPN with the lightweight, efficient architecture of Minimal Windows Server 2022, optimized for Azure, this solution ensures top-tier security with encryption and multi-protocol support.

Effortless installation. Ready-to-run with easy maintenance. Explore now for a smooth experience!
Configuring and Connecting to SoftEther VPN on Minimal Windows Server 2022 DC Azure Edition
Starting the Server
To start the server, launch the virtual machine (VM) via Azure.
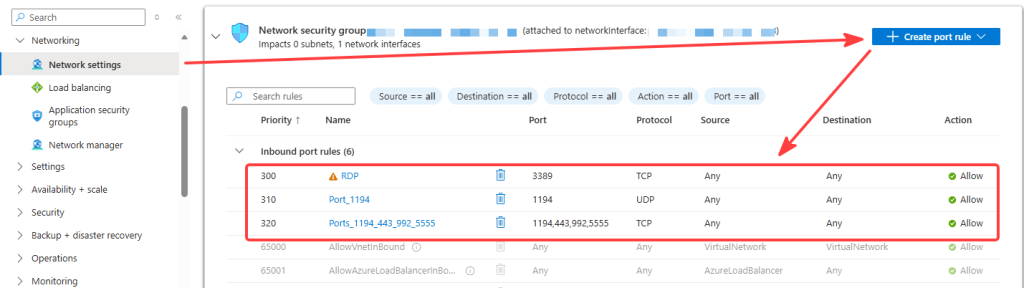
Opening Firewall Ports
For the VM to function properly, open TCP ports: 3389, 1194, 443, 992, 5555, and UDP port 1194 in the Azure Firewall’s network settings.
Connecting to the Virtual Machine
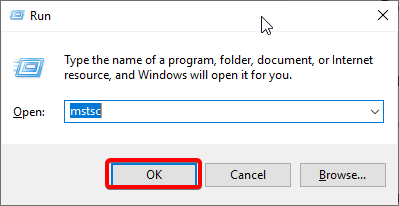
- Press Win + R.
- In the window that appears, enter “mstsc” and click “OK” to open Remote Desktop Connection.
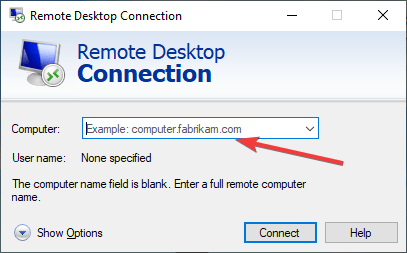
- Enter the VM’s IP address and click Connect.
- When prompted, enter your username and password, then click OK.
- Accept the security warning by checking the box and clicking Yes.

Configuring the VPN Server
- When connecting to the server for the first time, a text file containing the credentials SoftEther_Credentials will appear on the desktop. The file may appear with a short delay.
- Open SoftEther VPN Server Manager from the desktop.

- In the application window, click Connect.
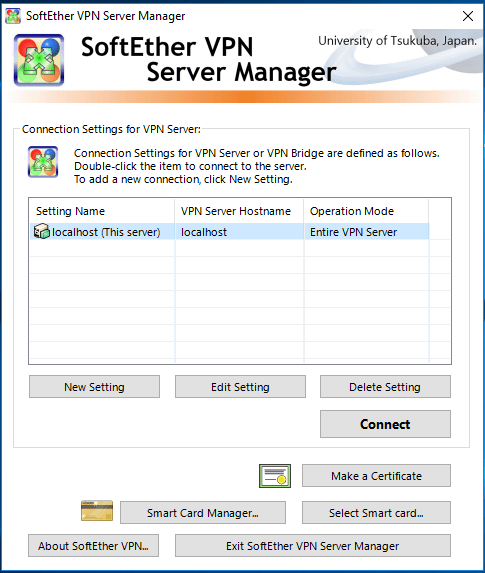
- Enter the password from the SoftEther_Credentials file.
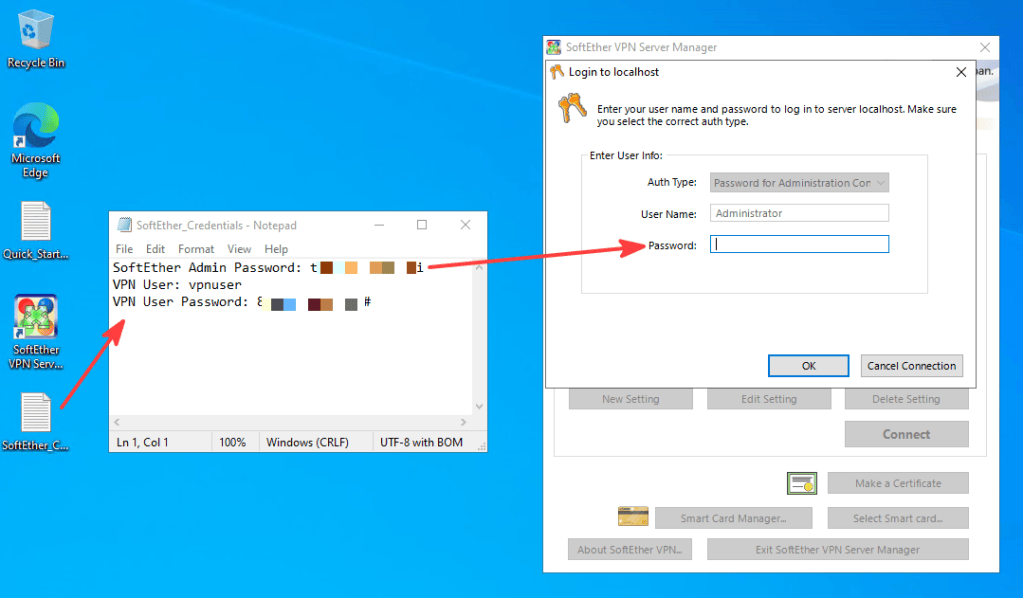
- To ensure proper network routing, enable Virtual NAT:
- Click Manage Virtual Hub.
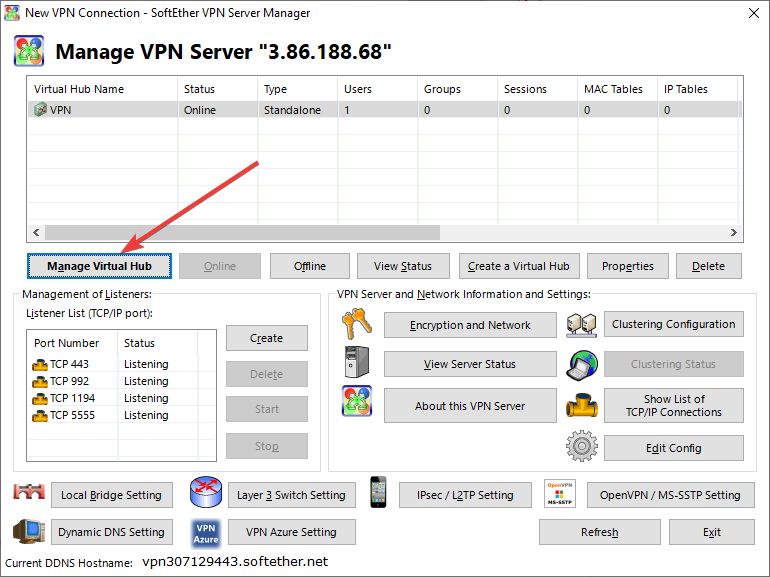
- Open Virtual NAT and Virtual DHCP Server (SecureNAT):
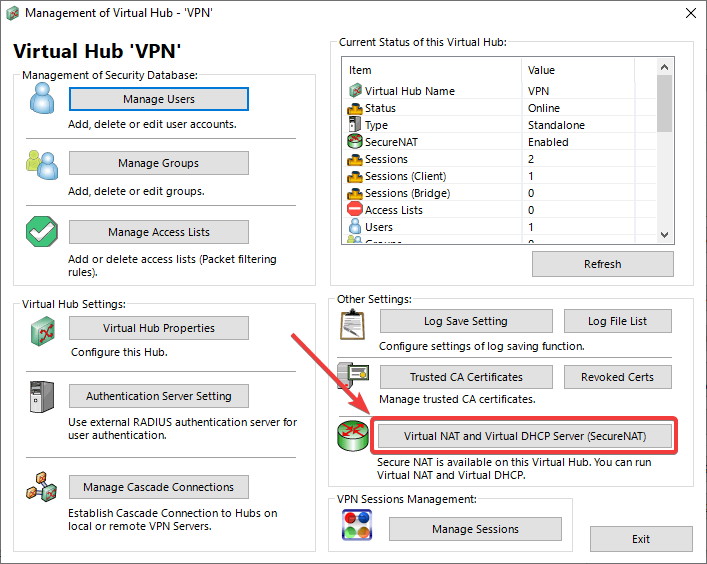
- Click Enable SecureNAT:
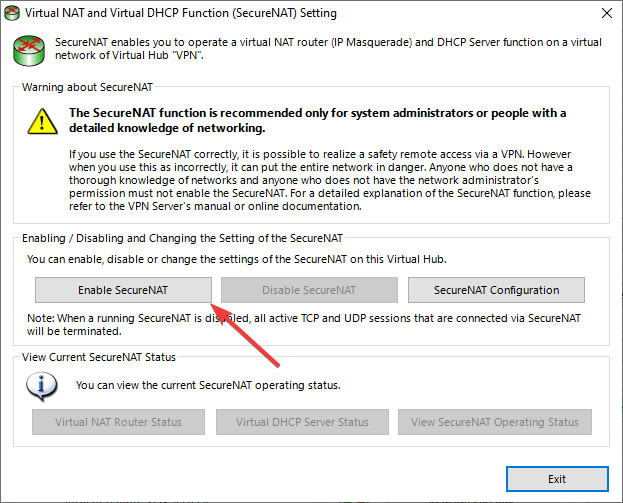
Creating VPN Users
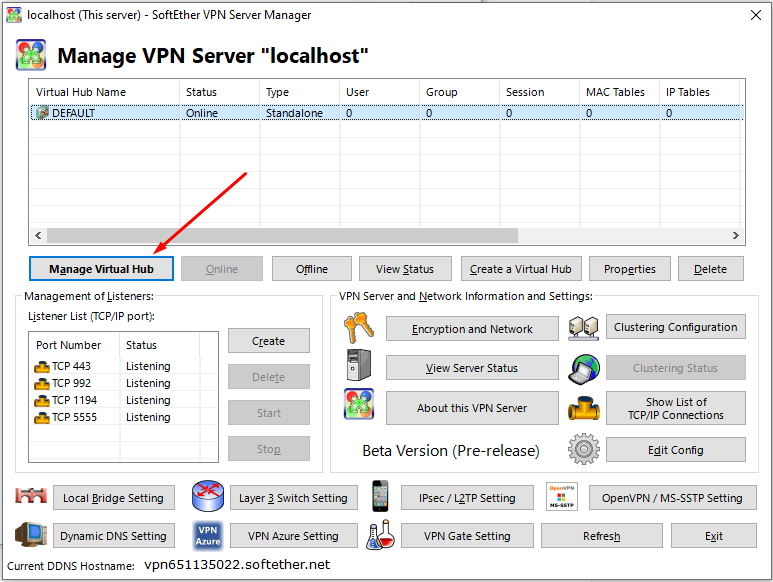
- To use the VPN, you need to add a user or use the default one. Click the Manage Virtual Hub button.
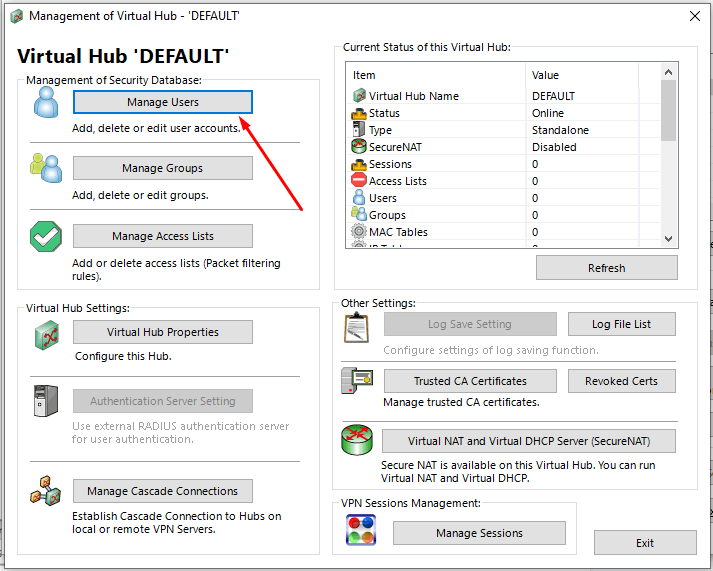
- Then click the Manage Users button.
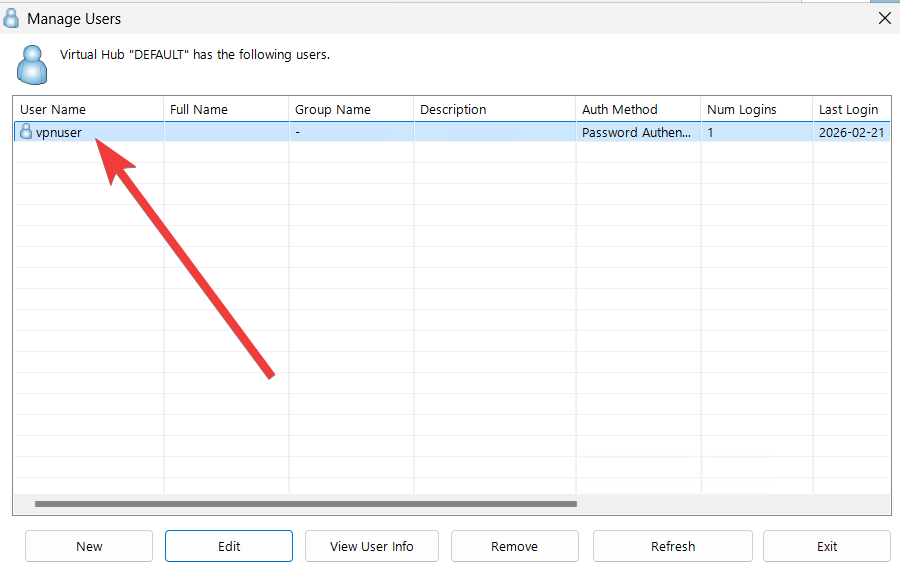
- By default, the user vpnuser is created.
- Its password is contained in the SoftEther_Credentials file.
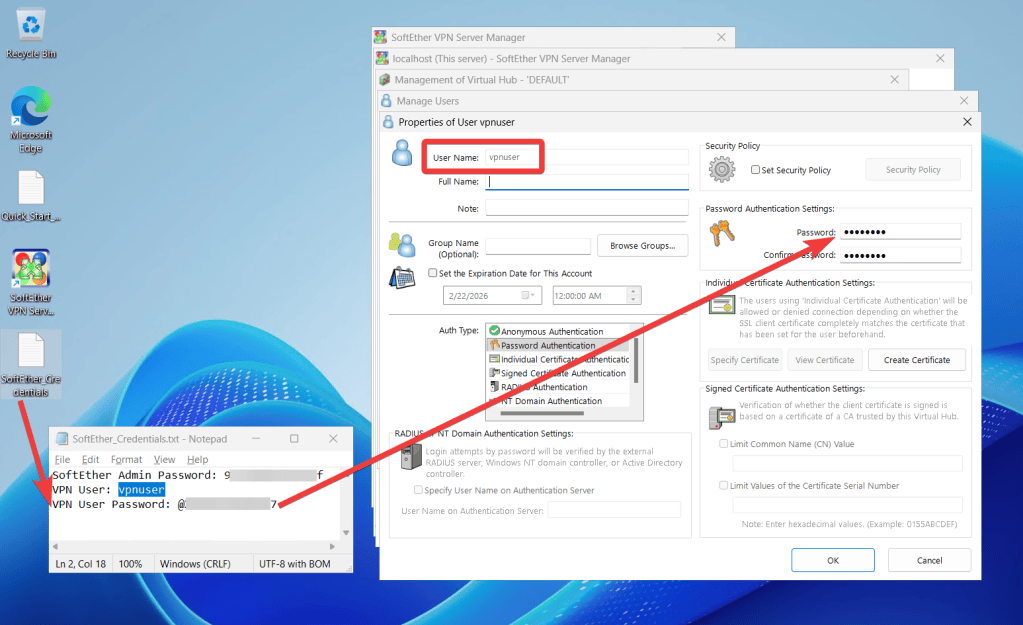
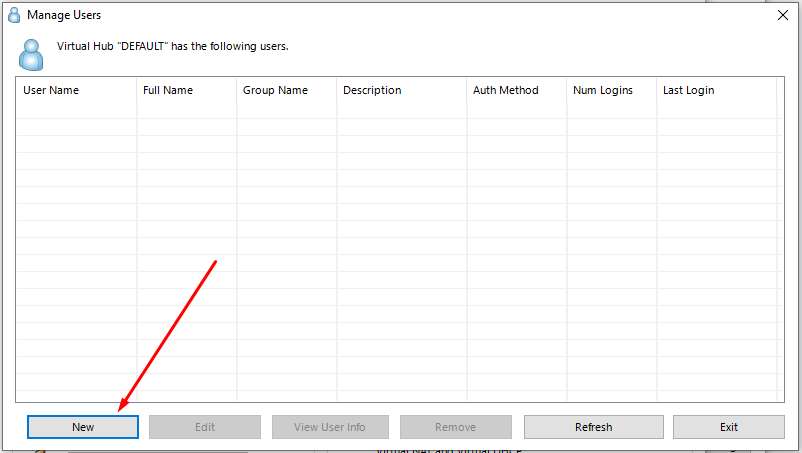
- Click New to create a new user.
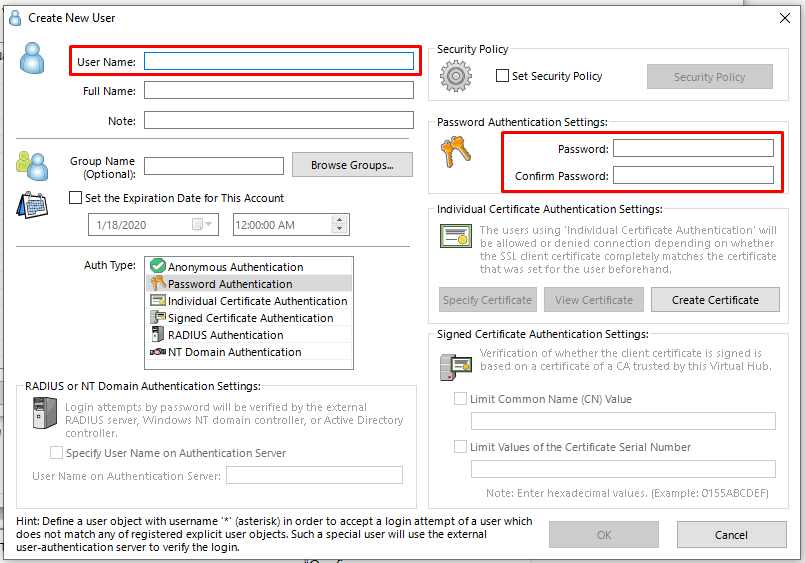
- Enter the user’s name in the User Name field, enter the password in the Password field, and re-enter the password in the Confirm Password field. After entering the information, click OK.
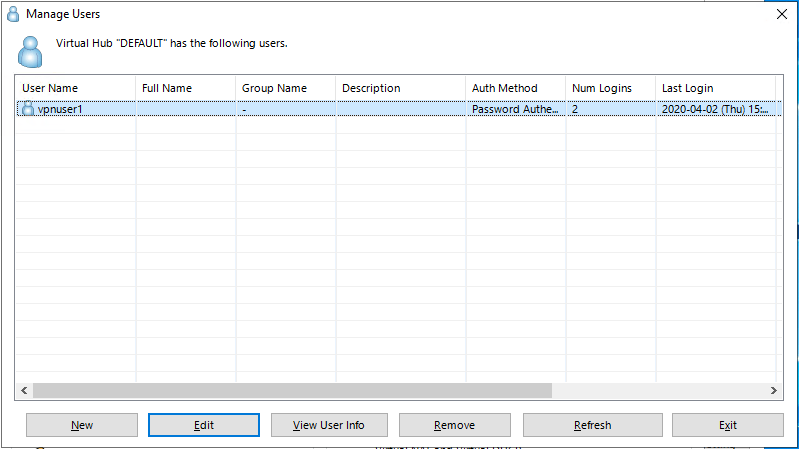
- To modify user credentials later, select the user and click Edit.
Creating a VPN Configuration File
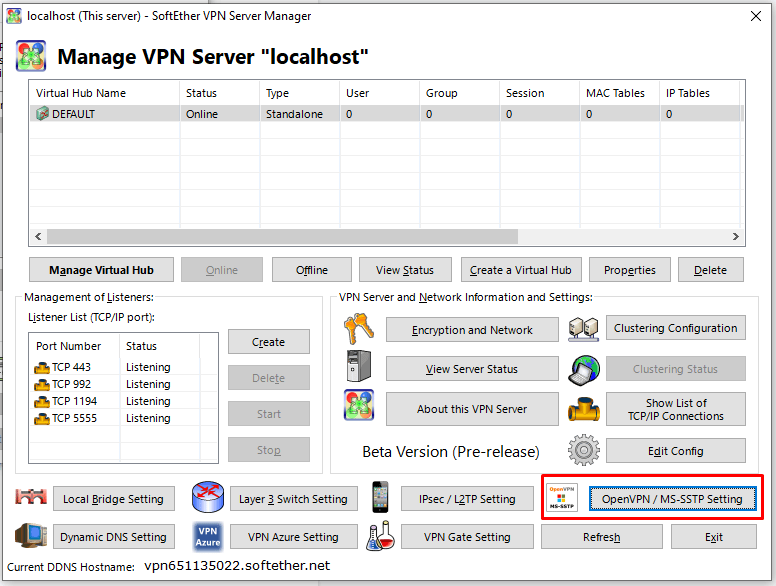
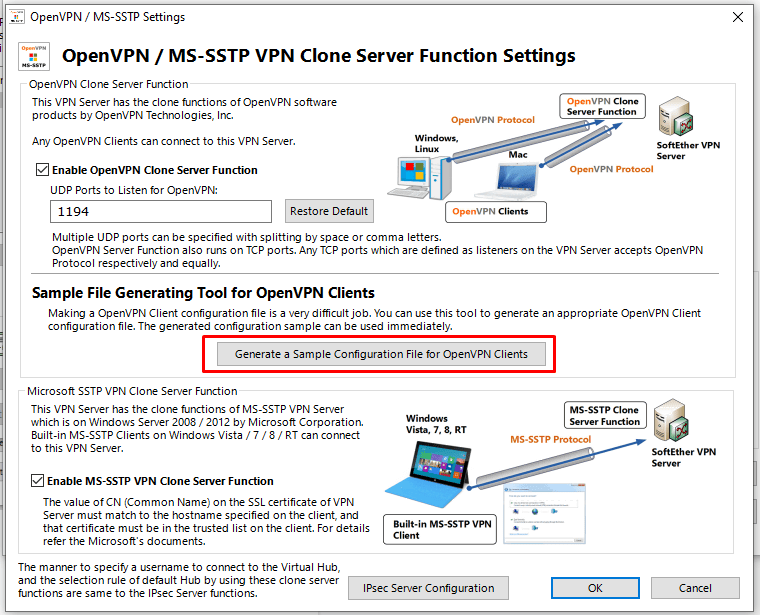
- To create configuration files, click the OpenVPN / MS-SSTP Settings button.
- Click the Generate a Sample Configuration File for OpenVPN Clients button.
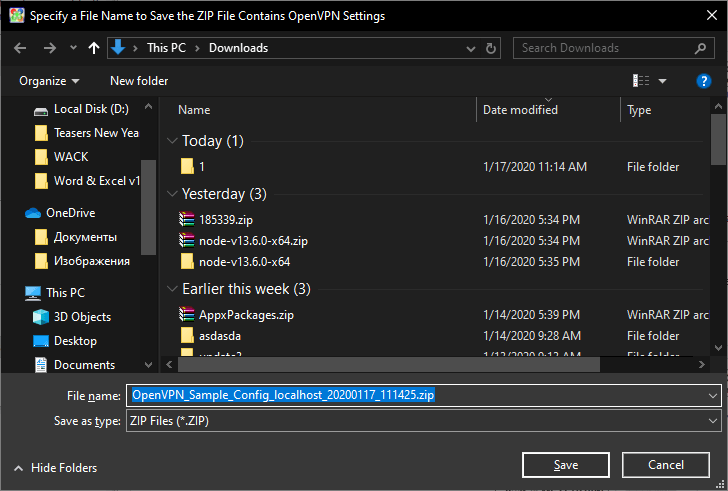
- Choose a save location when the Windows Explorer window appears.
- The following files are in the saved archive:
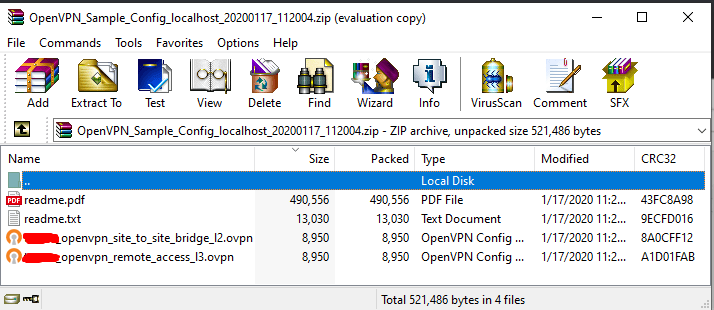
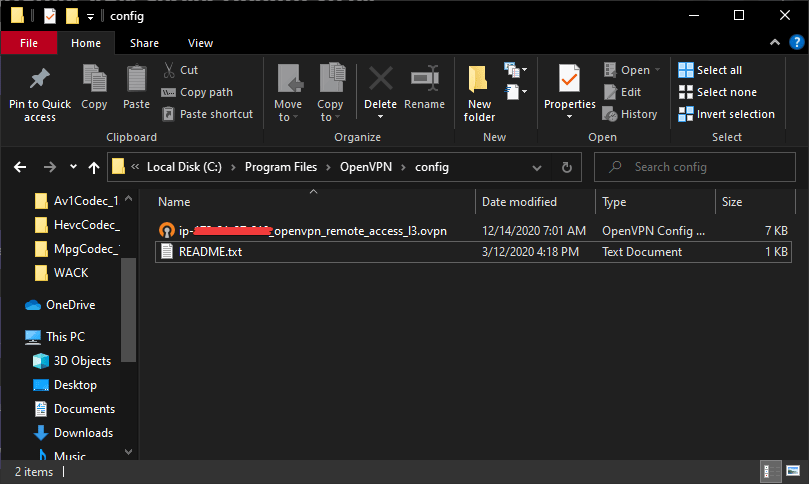
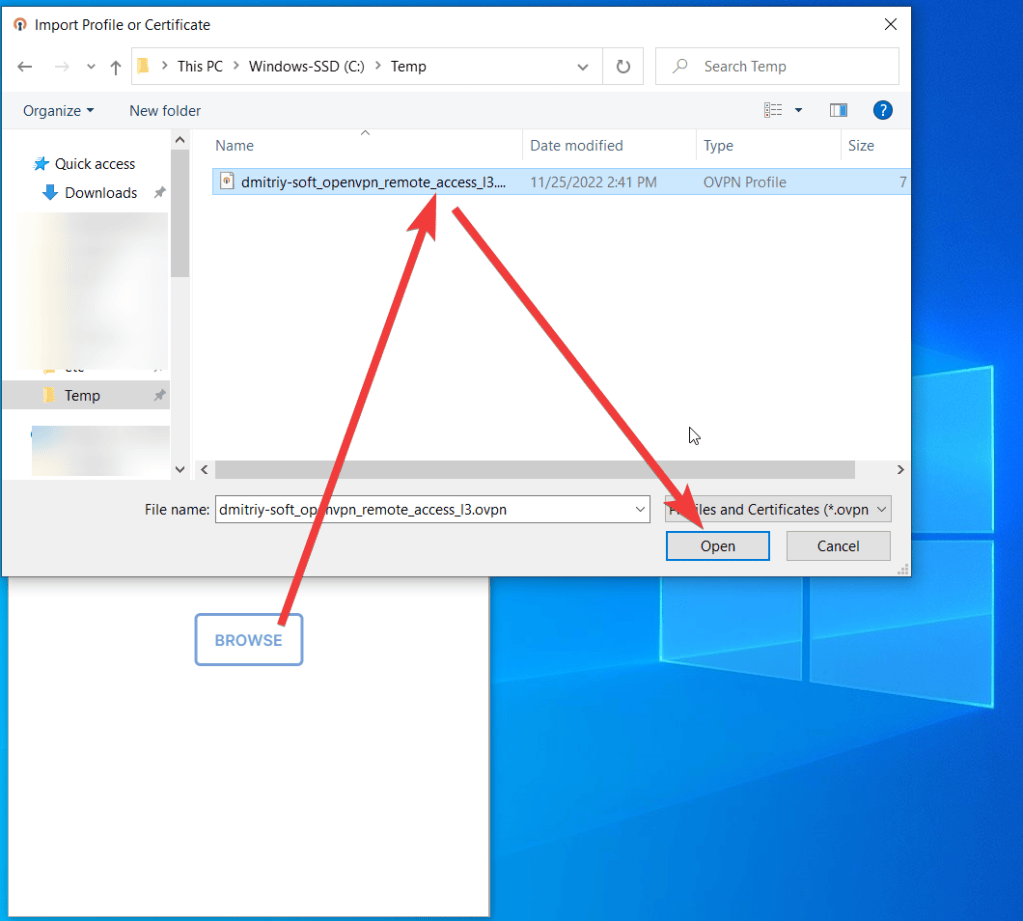
- You should save the file named “…_openvpn_remote_access_l3.ovpn” on your device.
Setting Up the VPN Client
- To connect using OpenVPN:
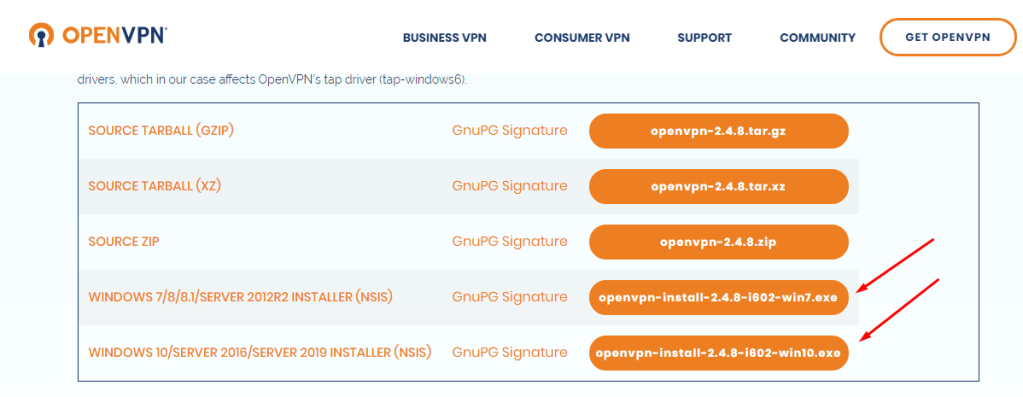
Download and install the OpenVPN Client from the official website.
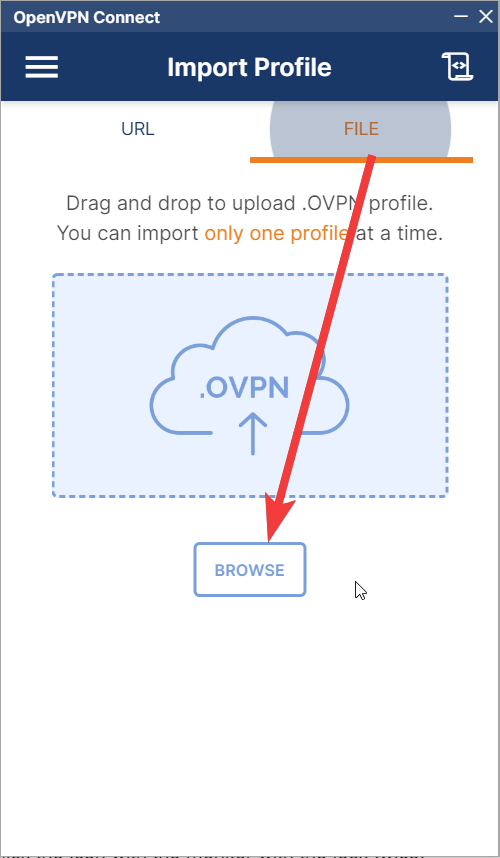
- Launch OpenVPN, then add the previously saved .ovpn configuration file.
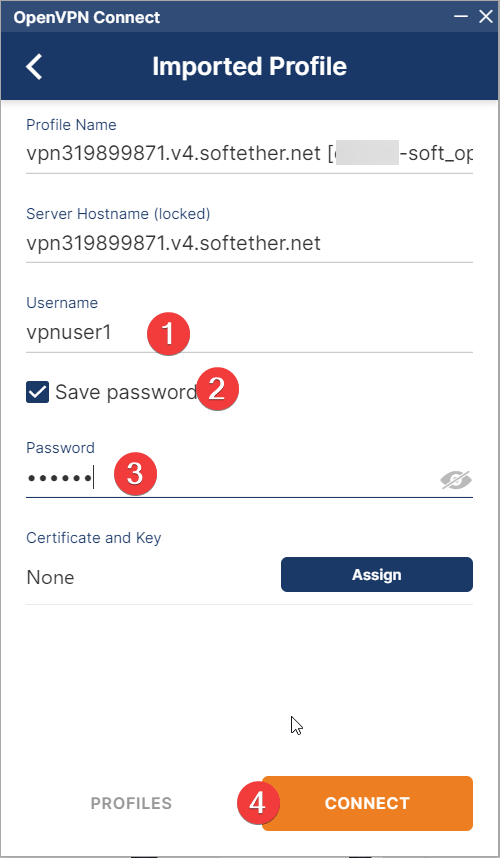
- Then enter Username (1), select the checkbox Save password (2) for your comfort, enter Password (3), and click Connect (4)
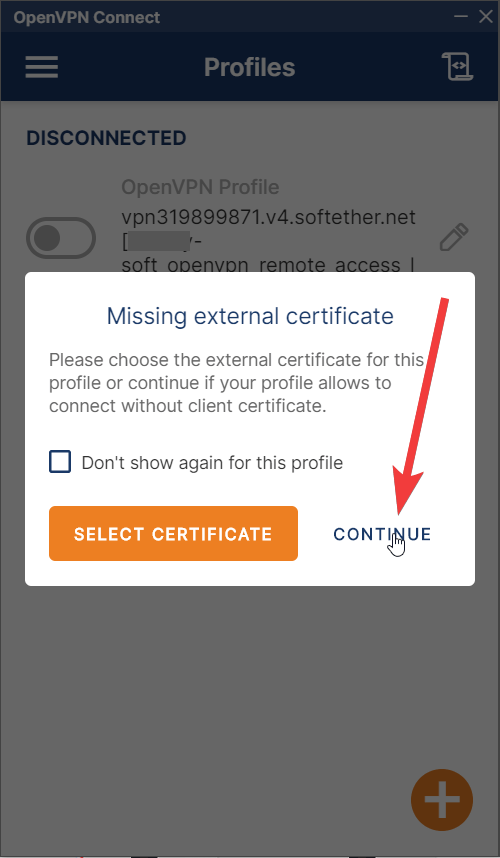
- Click Continue to confirm use without a certificate.
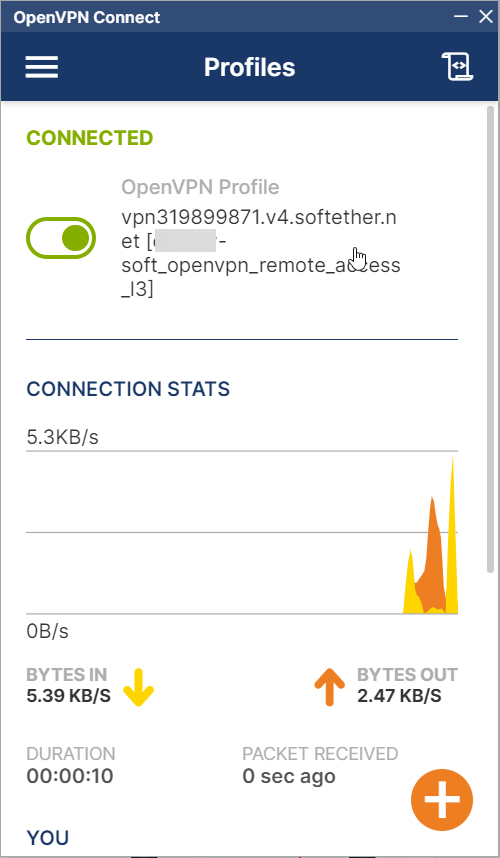
Your SoftEther VPN Server is now fully configured, and you can securely connect using your VPN client. SoftEther offers high-performance, multi-protocol VPN support, allowing you to establish remote connections with enhanced security and flexibility.
For more details, refer to the official SoftEther Documentation.

