
Postfix and Dovecot Mail Server on Debian 13 provides a stable and efficient platform for email hosting, secure mail delivery, and mailbox management built on the modern Debian 13 Linux environment.

Effortless installation. Ready-to-run with easy maintenance. Explore now for a smooth experience!
Configuration and connection to Postfix and Dovecot Mail Server on Debian 13
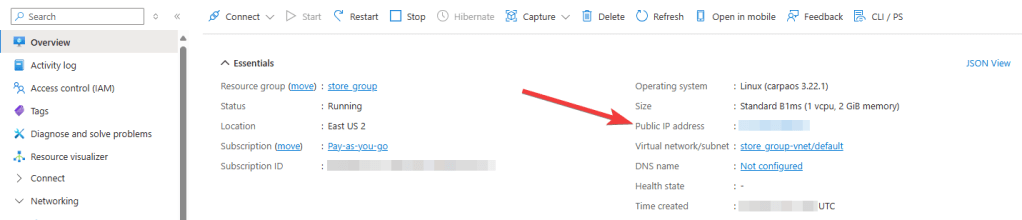
After purchasing and starting the VM, you should know its IP address. You can find it in the personal account of Azure. You need to select the virtual machine from the list. By clicking the item “Overview”, your IP is displayed in the line “Public IP Address”.
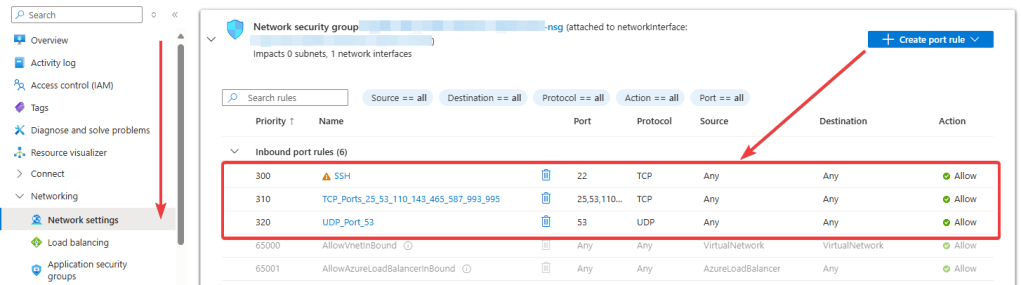
To work, you should open ports TCP 22, 25, 53, 110, 143, 465, 587, 993, 995, and UDP 53 in the network properties in the Azure firewall.
Connection to E-Mail Server Postfix
- To manage with a WireGuard Server, you should connect to a VM.
- With OpenSSH
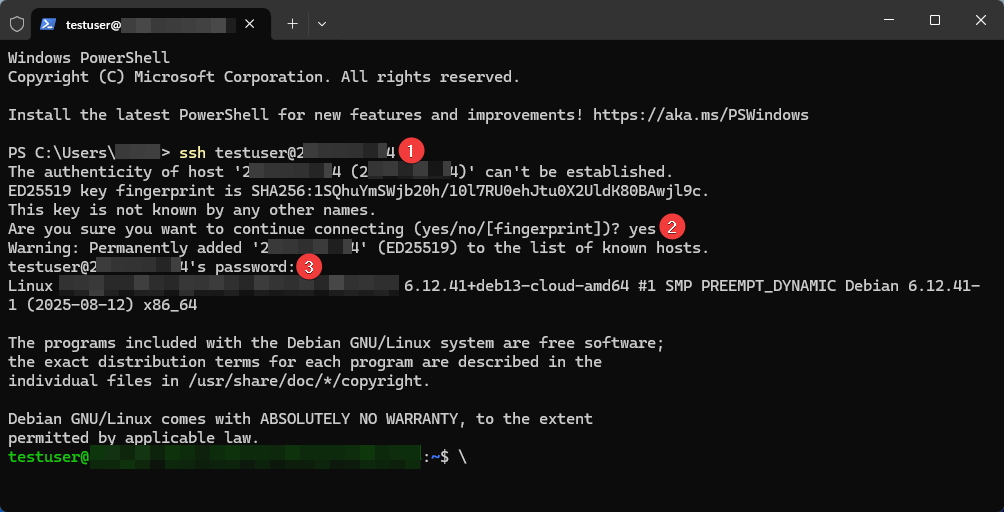
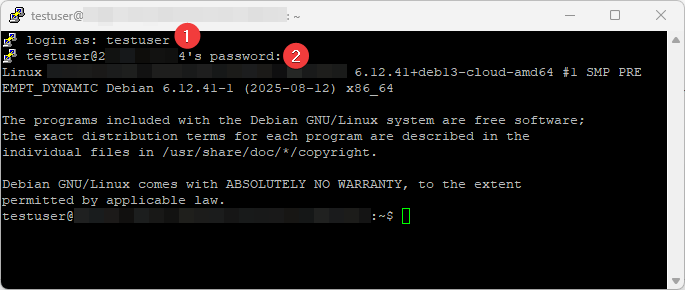
In the Windows 10 operating system (starting with version 1809), an OpenSSH client is available, with which you can connect to Linux servers via SSH. If Windows 10 is suitable and the OpenSSH client is installed, you can start connecting via SSH. To do this, launch a normal Windows command prompt and enter the command “ssh user@*vm_ip*” (1), where “user” is the username that was specified while creating the virtual machine and “*vm_ip*” is the VM IP address.
Then type “Yes” (2) and enter a password (3) that was specified while creating the virtual machine.
- With the PuTTY application
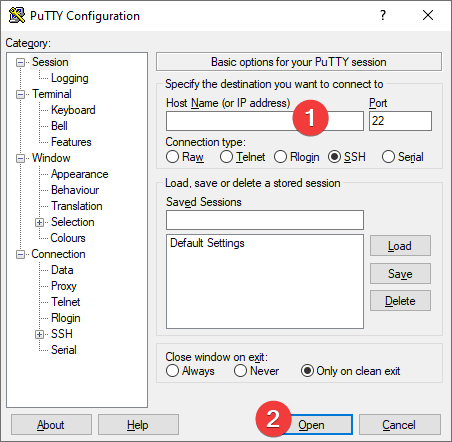
To do this, you need the PuTTY application to connect via SSH. You can download it at the following link – Download
Run Putty, enter the VM address in the “Host” field (1) and click “Open” (2) to connect.
In the opened console, you will need to enter a username (1) and a password (2) that were specified while the VM was being created (you’ll not see the password in the console while entering it).
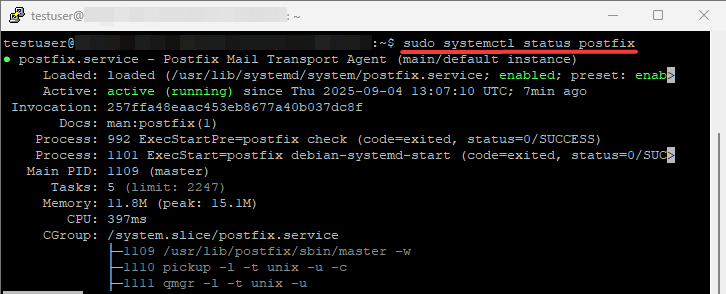
- To check the status of the Postfix service, you need to use the command:
$ sudo systemctl status postfix
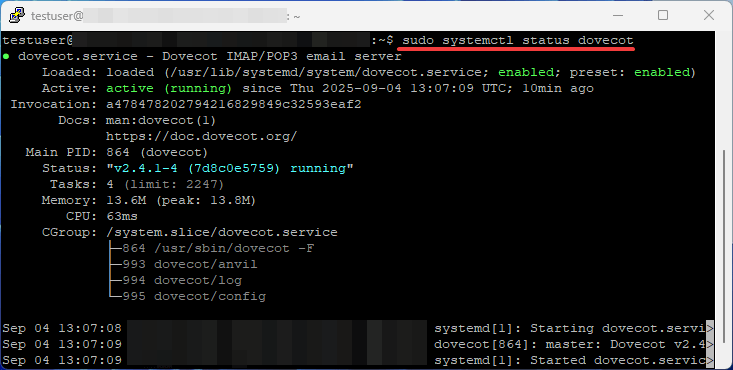
- To check the status of the Dovecot service, you need to use the command:
$ sudo systemctl status dovecot
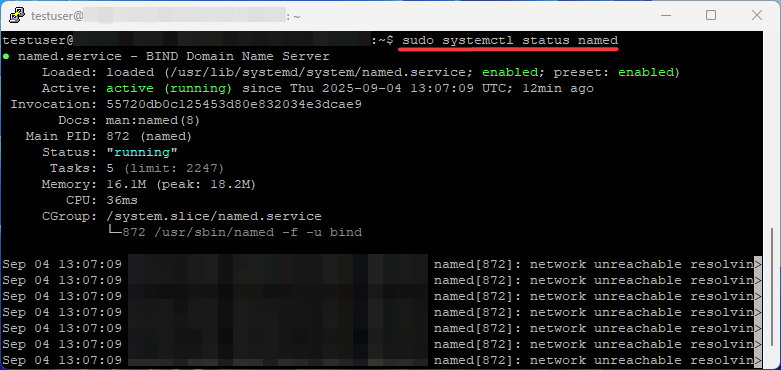
- To check the status of the Bind (DNS) service, you need to use the command:
$ sudo systemctl status named
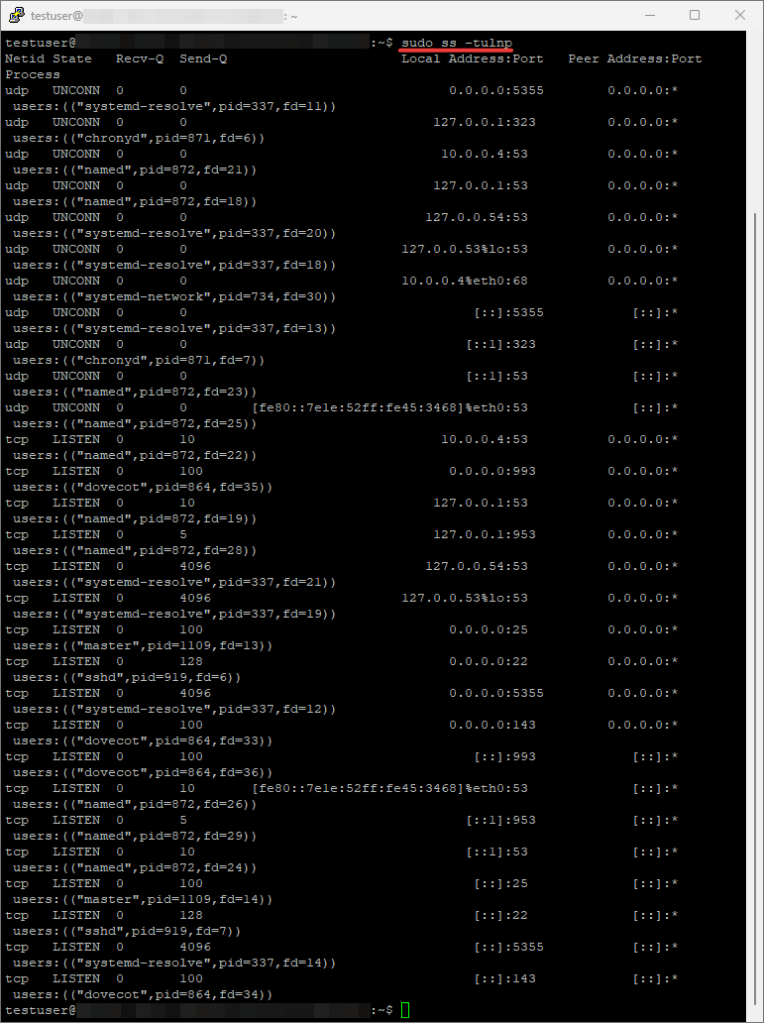
- To check the ports that are currently being listened to by system services (at this stage, you will only see ports for essential system services):
$ sudo ss -tulnp
Next, you need to configure the mail server components:
- Configure DNS records (MX, A, PTR, NS, SPF, DKIM, DMARC)
- Configure SSL/TLS certificates for secure connections
- Сonfigure Postfix – SMTP server for sending and receiving mail
- Сonfigure Dovecot – IMAP/POP3 server for mailbox access
- Create users and mailboxes.
Useful configuration resources
Postfix Basic Configuration Guide
Dovecot (IMAP/POP3 Server)
Recommendations
- Carefully study the official documentation before starting configuration.
- Make backup copies of configuration files before modifying them.
- Use the sudo ss -tulnp command to verify service startup after configuration.
Good luck with your email server setup!
