Experience the joy of sharing your music, knowledge, or message with the world, all powered by Icecast Streaming Server on Linux 7.9 Minimal.

Effortless installation. Ready-to-run with easy maintenance. Explore now for a smooth experience!
Connecting and configuring Icecast Streaming Server on Linux 7.9 Minimal
To start the server, run the VM through Azure Portal.
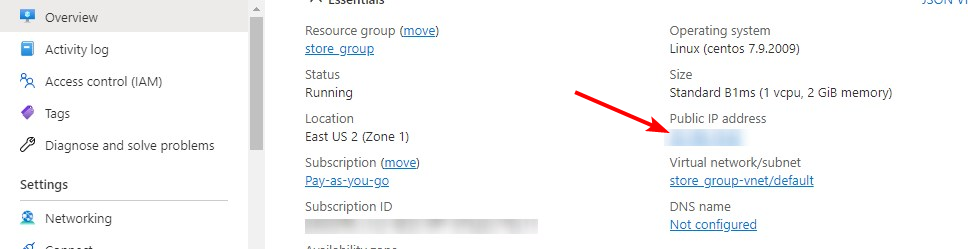
- For the connection to the server, you should know the IP address of the VM. You can find it in the personal account of Azure. (You need to select the virtual machine from the list. By clicking the item “Overview”, your IP is displayed in the line “Public IP Address”).
- To work, you must open ports 22, 8000 (TCP) in the network properties in the Azure firewall.

- To manage with an Icecast server, you should connect to a VM.
- With OpenSSH
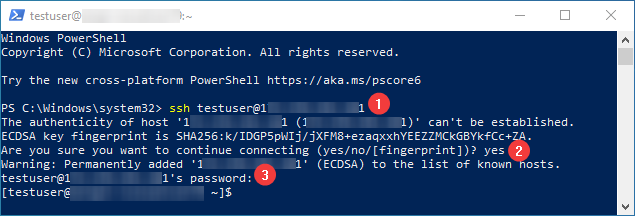
In the Windows 10 operating system (starting with version 1809), an OpenSSH client is available, with which you can connect to Linux servers via SSH. If Windows 10 is suitable and the OpenSSH client is installed, you can start connecting via SSH. To do this, launch a normal Windows command prompt and enter the command “ssh user@*vm_ip*” (1), where “user” is the username that was specified while creating the virtual machine and “*vm_ip*” is the VM IP address.
Then type “Yes” (2) and enter a password (3) that was specified while creating the virtual machine.
- With the PuTTy application
To do this, you need the PuTTy application to connect via ssh. You can download it at the following link – Download
Run Putty, enter the VM address in the “Host” field (1), and click “Open” (2) to connect.
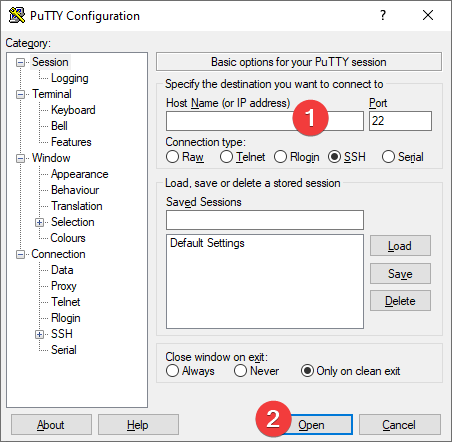
In the opened console, you will need to enter a username and password specified while the VM was being created (you’ll not see the password in the console while entering it).

- Enter the following command to open the configuration file
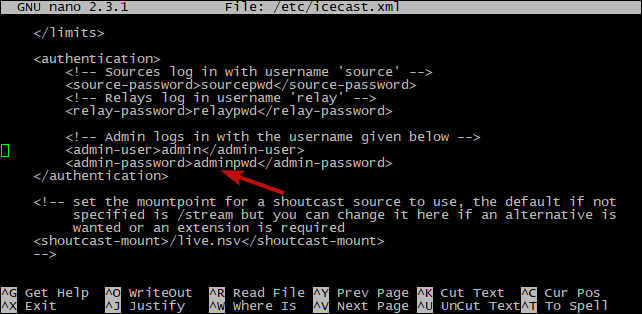
sudo nano /etc/icecast.xml
- After executing the command, editing the file will open. In order to go to the desired line, use the arrows on the keyboard. To paste the copied text, use the right mouse button.
In order to change the login and password for accounts, go to the <authentication> section and change the values that are inside the <*** – password> tags. For example, change adminpwd to a new password.
- Add the following lines inside the <icecast> tag (but not inside other tags) to add a test radio station.
<relay>
<server>ice4.lagrosseradio.info</server>
<port>80</port>
<mount>/lagrosseradio-metal-024.mp3</mount>
<local-mount>/metal</local-mount>
<on-demand>0</on-demand>
</relay>
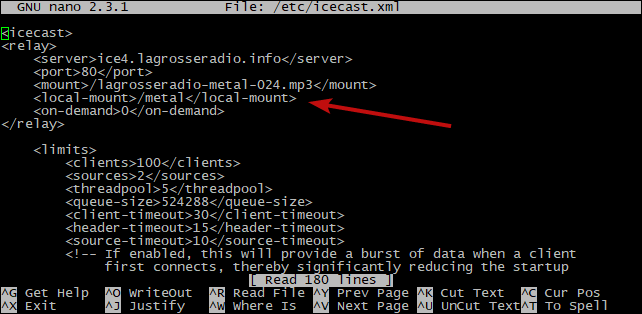
- Press “Ctrl + X” on the keyboard to exit the file. Then, you will be prompted to save the changes to the file – press “Y” on the keyboard to confirm, and press “Enter” to overwrite the same file.
- To apply the changes, you must restart the service. To do this, run the following command.
sudo systemctl restart icecast
- To manage the Icecast Streaming Server, you can use the following commands:
To start the Icecast Server:
sudo systemctl start icecast
To restart and reload configuration changes:
sudo systemctl restart icecast
To stop Icecast:
sudo systemctl stop icecast
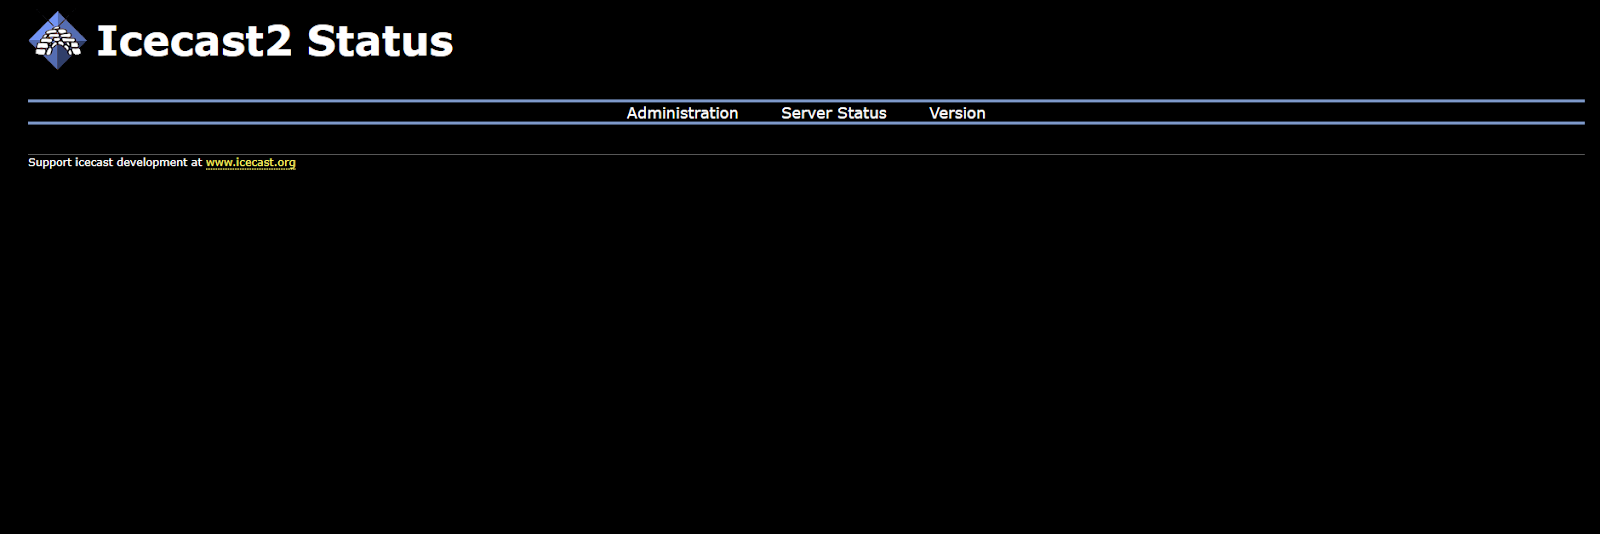
- Now you can go to the main page at http://*vm_ip*:8000 and the relay information will be on the main page. To open the station itself, go to the address http://*vm_ip*:8000/metal.
- In the browser enter http://”your_vm _ip”:8000 For example http://11.22.123.123:8000
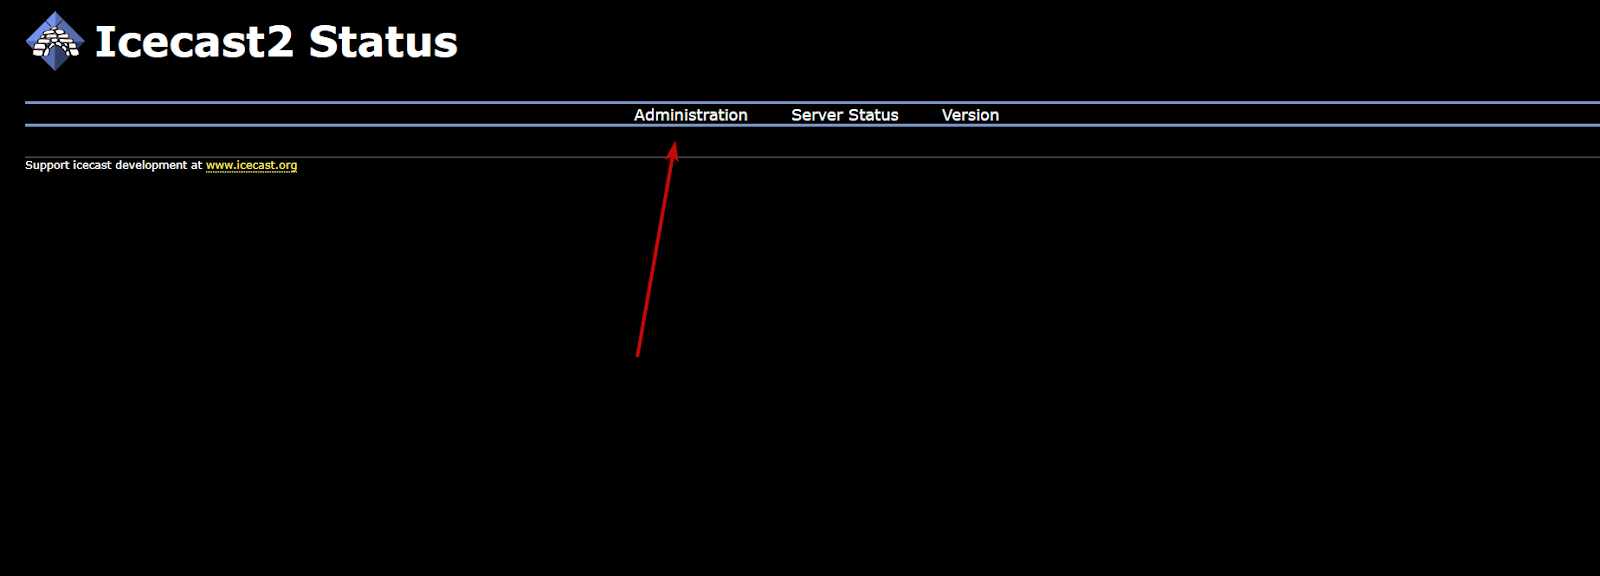
- Click on Administration
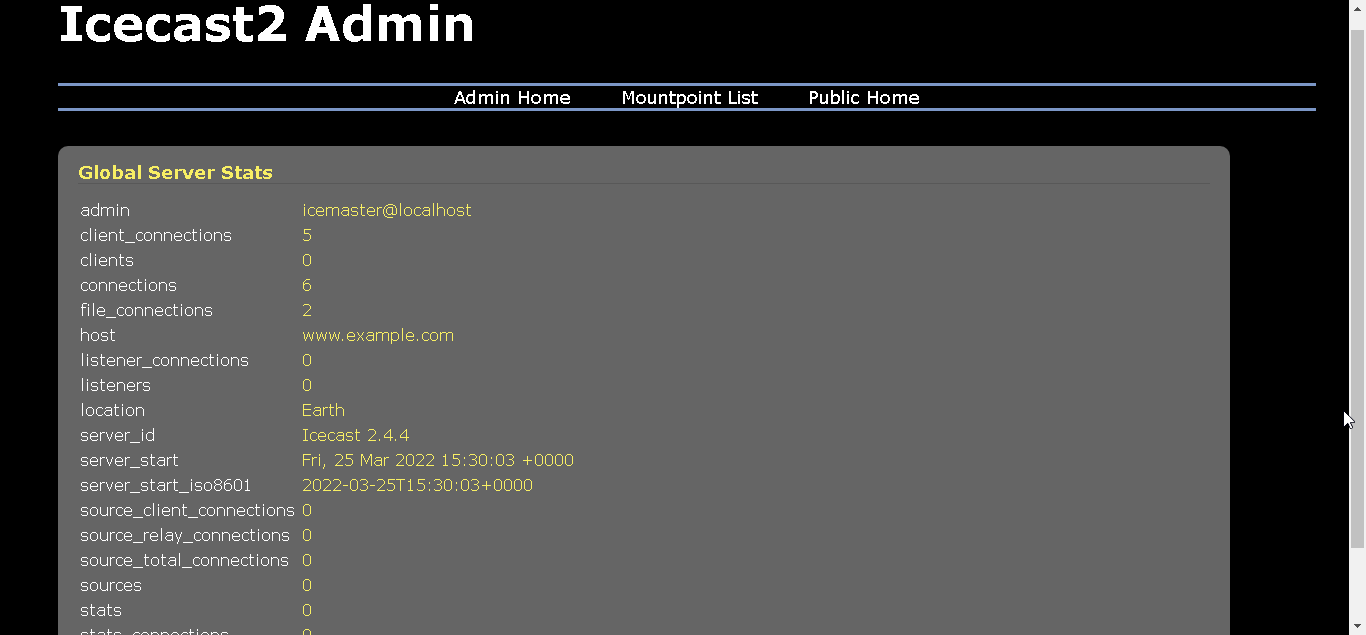
- In the window that appears, enter your username and password
Login- admin
Password – adminpwd

- The admin interface will open.
More detailed instructions can be found at Documentation and Information — Icecast
