Upgrade your infrastructure today to experience the countless advantages of our Active Directory DC on Windows Server 2022 DC

Effortless installation. Ready-to-run with easy maintenance. Explore now for a smooth experience!
Connection and configuring Identity Platform via Microsoft Active Directory® Domain Controller on Windows Server 2022 DC
CONNECTING TO THE SERVER
- To connect to the virtual machine, run the “Remote Desktop Connection” shortcut using “Win + R”. In the window that appears, enter “mstsc” and click “OK”.

- In the new window that appears, enter the IP address of the virtual machine and click “Connect”.

- In the window that appears, enter your username and password and click “OK”.
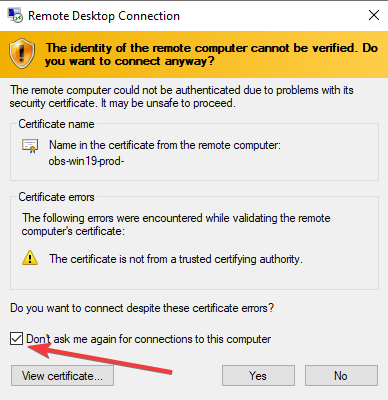
- Check the box and click “Yes”.
- The next window will be displayed
- Now you can work with a completely clean Active Directory on Windows Server 2022 DC
ACTIVE DIRECTORY INSTALLATION STEPS
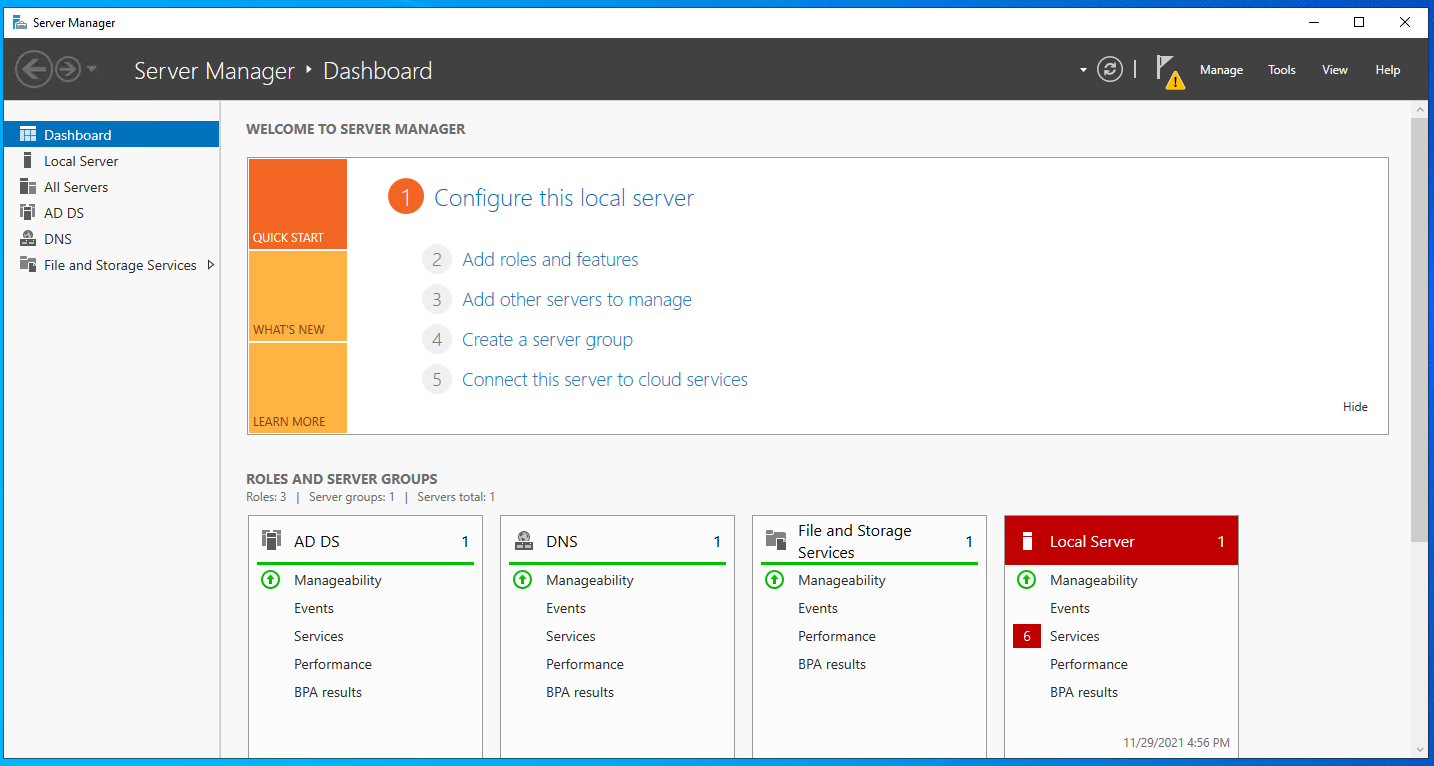
- Open up Server Manager, click on the yellow notification, and select Promote this server to a domain controller

- This will start the Active Directory Configuration Wizard. The following demo shows how to set up a new forest. But if you add this to an existing domain, you can choose the relevant option. Select the option to add a new forest and type FQDN for the domain. Then click <next>.

- On the next page, you can select the domain and forest functional levels. Then type a password for DSRM. Then click <next>

- Since we are creating the first DNS server in the new forest, it is not necessary to select additional parameters. Click <next> to proceed

- For the NETBIOS name, keep the default and click <next>

- The next page is for defining the NTDS, SYSVOL, and LOG file folders. You can either keep the default or define different paths for these. This demo shows how to keep the default paths. Once changes are made, click <next> to continue.

- The option to review configuration changes will be given on the next page.
If everything looks okay, you can click <next> to proceed, or otherwise, go back and change the settings.

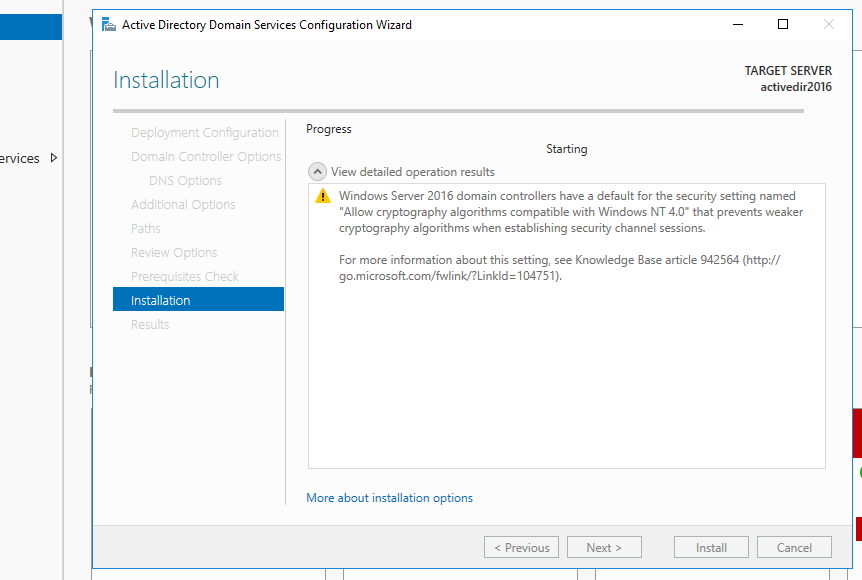
- In the next window, the prerequisite check will be done.
If it passes, it will enable the option to install. Click on the <install> button to begin the installation process.

- Then the installation process of promoting this server to a Windows domain controller will be started.
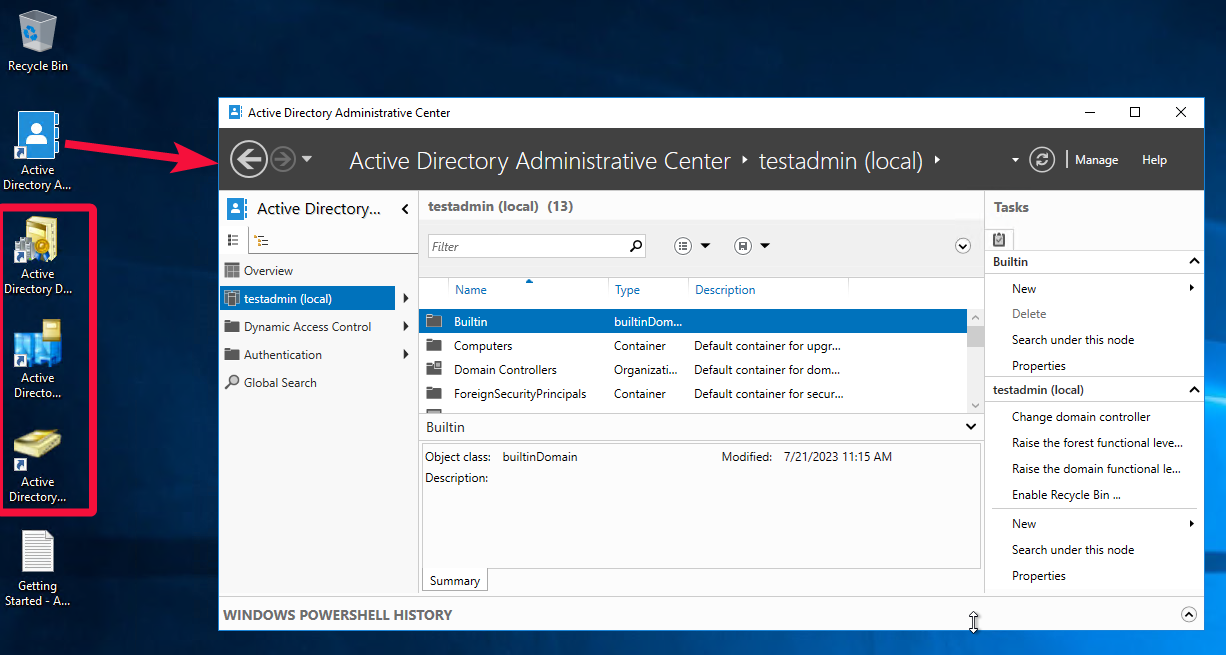
- After the AD installation, the server will restart automatically. Once it comes back online, log in to the server as domain administrator.
Once logged in, you can start managing the domain resources using shortcuts on your desktop to manage Active Directory DC Server.
- Also, you can use Get-ADDomain | fl Name, DomainMode and Get-ADForest | fl Name,ForestMode from PowerShell to confirm the domain and forest functional levels

- Depending on your needs, you can open the following ports in the Azure firewall
53 TCP/UDP – DNS
88 TCP/UDP – Kerberos authentication
123 UDP – W32Time/NTP
135 TCP/UDP – Microsoft RPC Endpoint Mapper
137 UDP – NetBIOS Name Resolution
138 UDP — NetBIOS Datagram Service
389 TCP/UDP – LDAP
139 TCP – NetBIOS Session Service
445 TCP – SMB
464 TCP/UDP – Kerberos Authentication
636 TCP/UDP – LDAP SSL
3268-3269 TCP – Global Catalog
49152-65535 TCP/UDP — Randomly Allocated Ports DFSR RPC
ICMP (Ping)
By following these steps and ensuring the necessary ports are open, you’ll have successfully configured and connected to your Active Directory on Windows Server 2022 DC, allowing you to efficiently manage your domain resources.
